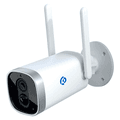
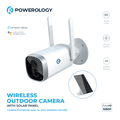
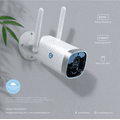
Powerology Wireless Outdoor Camera with Solar Panel - White
Color: White
Product features
- CompatibilityGoogle Assistant / Amazon Alexa
- Battery Capacity10400 mAh
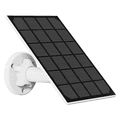
- Solar Panel Power3W
- Solar Panel Cable Length3 Meters
- Camera Resolution2 MP
- Working Time3 Months
More about this item
- Built-In-Battery
- Motion Sensor
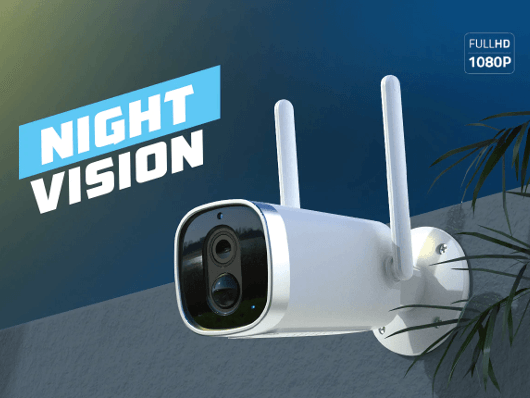
- 1080P Full HD
- Night Vision
- IP65 Water Resistant
Warranty
Out of stock
Overview
Description
Powerology aims to embed into each and every product with envision style, technology, and performance.
The wireless outdoor camera offers compatibility with Google Assistant / Amazon Alexa which enables you to easily access your camera using voice assistants.
Powerology is well-versed in its thoughtful production, the camera has a built-in 3W solar panel to serve at your convenience.
The 10400 mAh battery capacity of the camera is enough to run the system sufficiently without any disruption.
The 2 MP camera resolution allows a clear image and thanks to the night vision feature you can now monitor your surroundings 24 hours with clear imaging technology.
ID
RBIwcpvtvj46f77
Created on
Oct 14th 22
Updated on
Mar 28th 24
Weight
0.045 kg
Width
43.100 cm
Height
21.300 cm
Length
38.400 cm
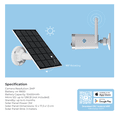
Specifications
BrandPowerology
ModelPWOCSPWH
ColorWhite
CompatibilityGoogle Assistant / Amazon Alexa
Battery Capacity10400 mAh
Solar Panel Power3W
Solar Panel Cable Length3 Meters
Camera Resolution2 MP
Working Time3 Months
We all care about privacy and living in peace. Powerology Solar Powered Wireless Security camera is a smart and fully equipped camera. Bring this built-in battery camera to any place, and you will get motion detection, high-quality night vision, App compatibility, and solar panel.
Add security anywhere you need it outdoor to see and hear everything. Enjoy the flexibility in controlling the camera and stay conscious with the live view feature in Powerology wireless outdoor camera with a solar panel. You will never miss a thing with our Powerology smart gadget.
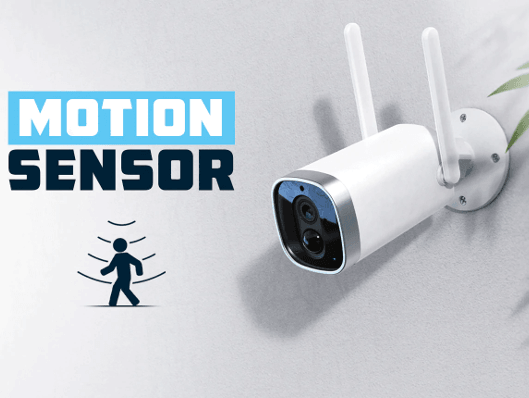
Motion Sensor
Almost all new manufactured outdoor security cameras are equipped with motion sensors. However, all of them are not able to detect any kind of motion. Powerology Solar Powered Wireless Security Camera is super sensitive to motion whether person, automotive, or any other thing. Never miss a movement in your house surroundings and let Powerology outdoor security camera define the safety for you.
Night vision
Clear footage for more visual details. At the night get the exact resolution in the day. Nowadays all the producers try to use night vision as a feature in their products, but we all know that the display quality is not the same for all of them. Powerology made this camera to see and capture footage in total darkness with the one-in-a-kind display quality. Security is not dependent on time, day, and night safety with Powerology Solar Powered Wireless Security camera.

Limitless Power, Limitless Security
This security camera has a built-in rechargeable battery. Forget about the over and overcharging process, with the 10400mAh battery capacity you just need to recharge it after 3 months of constant usage. Powerology considers an alternative way for recharging the battery, and that is using solar panels as a power source in order to make unlimited power real. Keep the battery fully charged with the included Solar Panel. From now on you are free from replacing and charging the battery.
Solar Panel Installation
The instruction for setting up this solar-powered wireless security camera is given below:
- Fix the base to your mounting location using the included screws. If the installation surface is soft or unstable, first use a φ6.0 drill bit to drill a hole in the wall, then insert the anchor nail into the hole, and fix the base with screws.
- First, install the locking screw cap into the universal joint and then screw the circular socket nut into the universal joint.
- Screw the universal joint into the back of the solar panel. Tighten it firmly with the attached nut.
- Screw the locking screw cap into the base. Make sure that the universal joint is angled upward.
- When adjusting the solar panel left or right, loosen the locking screw cap, turn the sleeve rod, and tighten the locking screw cap when the panel is in position.
- The solar panel’s angle can be adjusted up and down up to 90°.
After the installation is complete, please check that all locking mechanisms are tightly secured.
Reviews
Ask Question(4 stars)Verified Purchase
Very nice app ,easy to use , reasonable prices, and great selection to choose right product ,thnx runbazaar.
4.0 rating based on One review
0
0 Reviews0
1 Review0
0 Reviews0
0 Reviews0
0 Reviews